Painting brick can seem like a good idea at the time, but later on you may decide you want to restore your brick back to its original look. Removing paint from brick can be challenging, but with the right supplies and techniques, it can be done. Here is an in-depth, step-by-step guide on how to successfully remove paint from brick.
Why Remove Paint from Brick?
Before diving into the process, it helps to understand why you may want to remove paint from brick in the first place. There are several good reasons to consider stripping paint from brick surfaces:
- Restore historic look – For older homes, painted brick takes away from the original historic aesthetic. Removing the paint can help restore the home’s true character and preserve its history. Exposing the original brickwork helps the home maintain its vintage vibe.
- Improve curb appeal – Natural brick has a timeless, classic look that instantly improves the exterior appearance of a home. Painted brick, on the other hand, can sometimes make a home look dated. Removing paint to showcase the raw brick can boost your home’s curb appeal which is especially beneficial when selling.
- Remove outdated colors – Tastes in paint colors change over time. What was popular decades ago may look rather garish today. Removing old paint allows you to expose the natural, neutral brick color and tone. This provides a blank canvas for a fresh coat of more modern colored paint if desired.
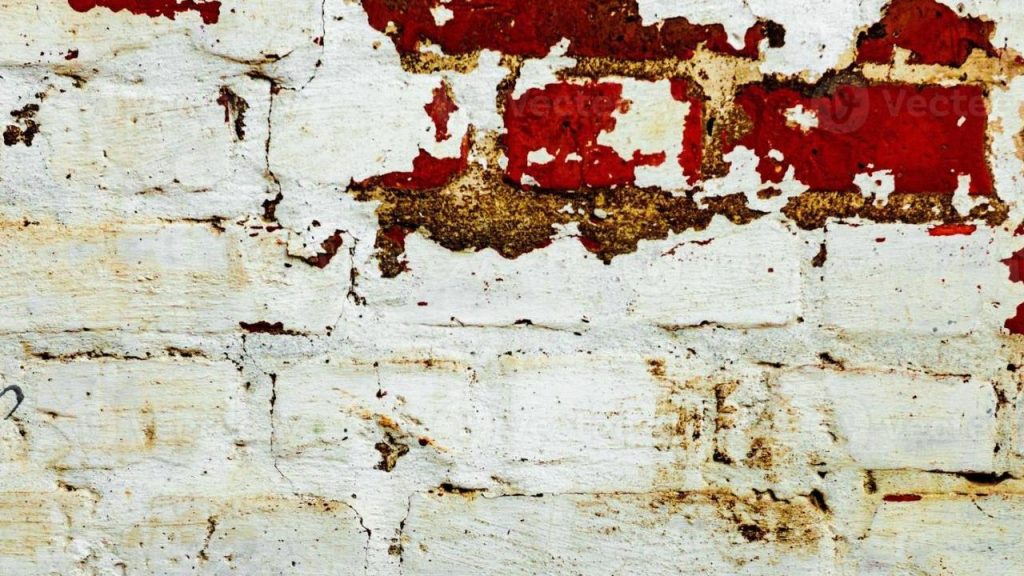
- Repair damaged paint – Exterior paint is exposed to sun, rain, snow and other elements that can lead to cracking, chipping, peeling and overall deterioration. Removing all the paint entirely can often be better than trying to touch up or salvage old, damaged areas.
- Change texture – Painting over brick gives it a uniform, often glossy look that hides the original varied texture. Removing paint restores the depth, dimensionality and visual appeal of raw brickwork.
- Lighten up dark walls – In some cases, brick may have been painted in a dark or bold color. This can make rooms feel small and cavelike. Stripping off paint lets natural light reflect off the brick to open up dark spaces.
- Reduce allergens – Paint build up over time can trap dust, pet dander and other allergens. Removing paint helps create a cleaner, healthier living environment.
There are several great reasons to consider removing paint from your home’s brickwork. Doing so can restore beauty, add value and improve your living space both aesthetically and functionally.
How to Remove Paint from Brick
Removing paint from brick is a labor intensive project, but the results can make the time and effort worthwhile. Here is a step-by-step process for successfully stripping paint from brick:
Gather Your Supplies
You’ll want to stock up on these recommended supplies before tackling a brick paint removal project:
- Paint remover/stripper: Use a high-quality chemical paint remover designed specifically for brick, masonry and stone. Avoid strippers intended for wood only.
- Plastic tarps/drop cloths: Cover the ground and any landscaping around the brick to protect from paint drips and debris.
- Paint scraping tools: A variety of scrapers, putty knives, wire brushes and sandpaper grits are handy for scraping off different layers and types of paint.
- Pressure washer: A pressure washer helps blast away paint leftover after scraping. Use caution not to damage delicate bricks with too high pressure.
- Paint thinner/mineral spirits: Used to remove paint stripper residue left after washing off loosened paint.
- Stripping pads: Non-abrasive scrub pads help remove leftover paint or residue without damaging the brick face.
- Paint brushes and rollers: If repainting, you’ll need primer and new paint designed for exterior brick along with brushes, rollers and paint tray.
- Eye protection: Wear proper safety goggles to shield eyes from paint stripper, paint flakes and brick dust.
- Gloves: Chemical-resistant gloves protect skin from harsh paint removers and paint residue.
- Mask/respirator: Wear an approved mask or respirator to prevent inhaling fine brick dust particles or old lead paint flakes.
Having all recommended supplies on hand makes the stripping process safer and more efficient. Don’t skimp on safety gear or proper chemical strippers.
Prep the Brick Surface
Before starting to strip paint, take time to properly prepare the brick surface:
- Remove any furniture, decor, fixtures or landscaping that could get damaged by stripping chemicals or debris.
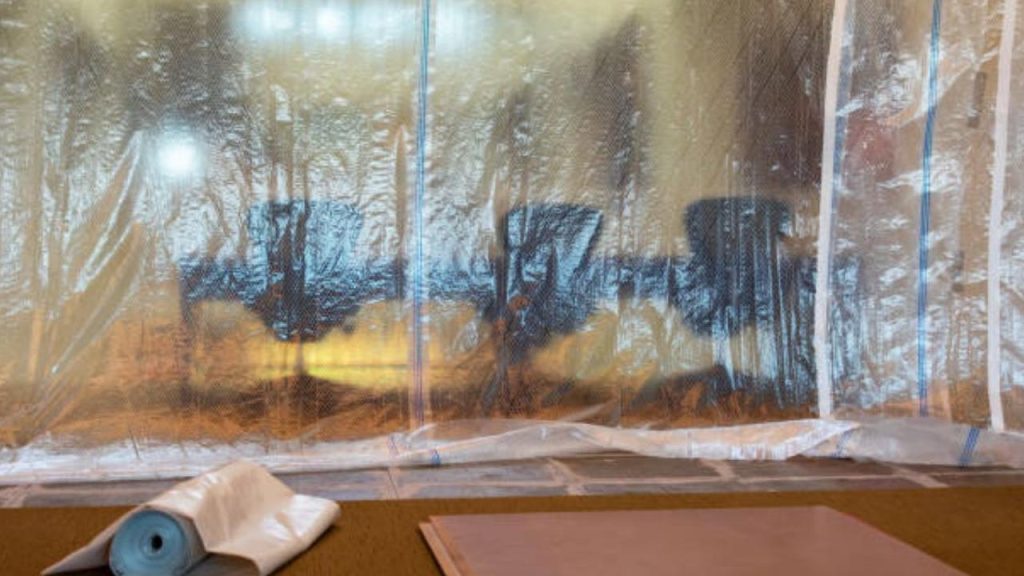
- Cover the ground and any nearby plants/landscaping with tarps to catch paint chips and residue.
- If using a pressure washer, mask and cover any nearby windows, doors, electrical boxes or fixtures that could get damaged by water spray.
- Wear all recommended safety gear – gloves, goggles, mask/respirator, protective clothing, etc.
- Clear any rain gutters of debris that could clog them once paint starts coming off.
- Have a wet/dry shop vac handy to contain paint chips and liquid waste as you work.
Proper prep contains debris and chemical runoff while protecting the surrounding area during stripping. Don’t neglect these important steps.
Apply Chemical Paint Remover
With the surface prepped, it’s time to start applying a paint remover or stripper:
- Thoroughly read and follow all label directions for your chosen paint stripper product.
- Shake the container well before using and avoid breathing in fumes.
- Apply a thick, even coat using a chemical-resistant paintbrush, covering the entire painted surface.
- Let stripper soak and penetrate for the recommended time per label instructions. This softens multiple layers of paint.
- Reapply more stripper to any stubborn spots not loosening up during soak time. Keep it wet.
- Avoid letting stripper dry out before the allotted time is up. Reapply to keep wet if needed.
Using the right stripping chemicals and method is crucial for softening paint for easier removal. Don’t rinse it off yet! Let it work it’s magic for full effectiveness.
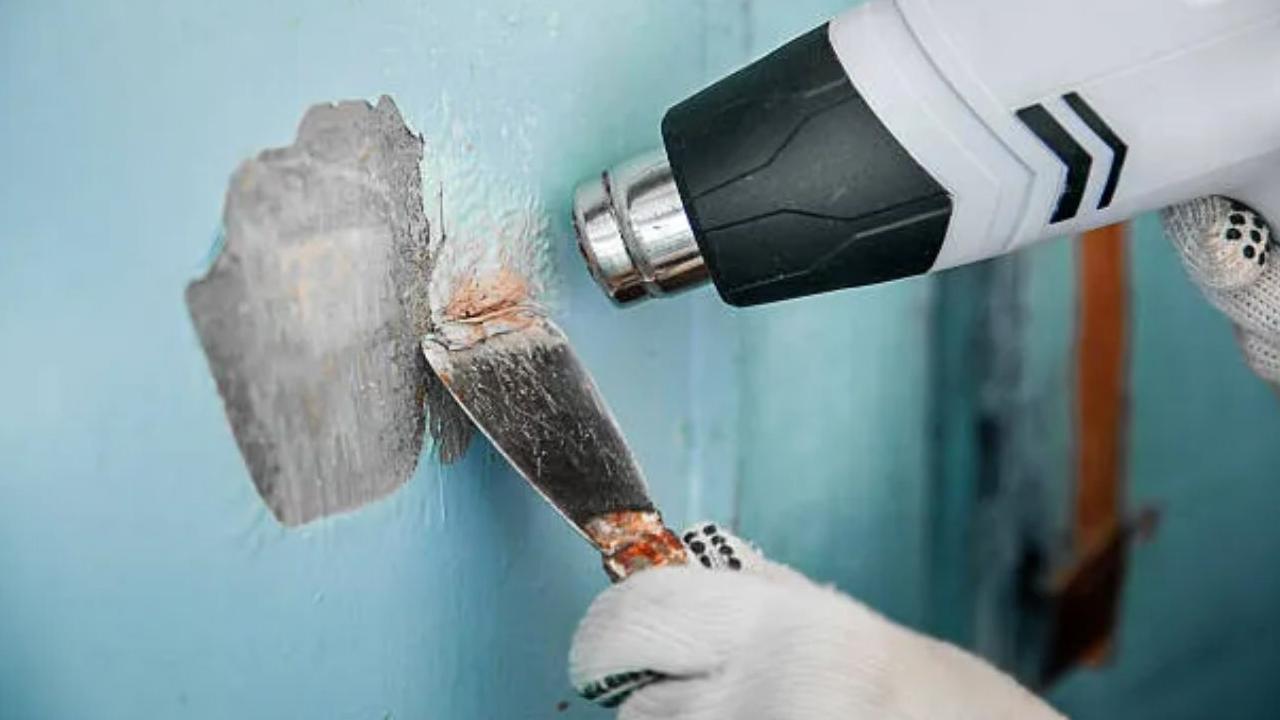
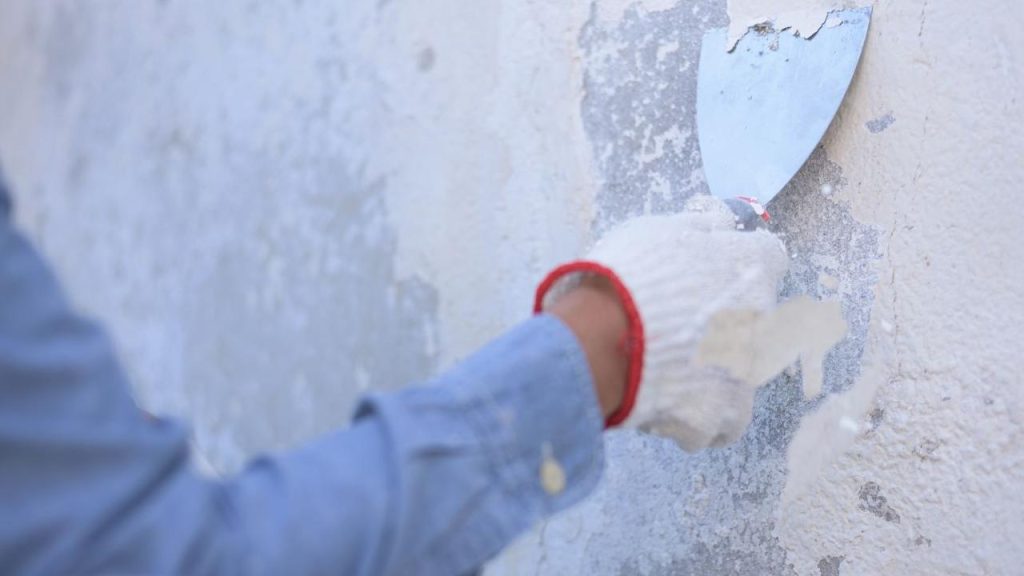
Scrape Away Softened Paint
Once the stripper has soaked in fully, it’s time to start gently scraping away the softened paint:
- Hold putty knife at 45° angle to surface and slowly lift paint up and away. Start at edges or natural grooves in brick.
- For heavily textured or uneven surfaces, use a wire brush to dislodge paint stuck in crevices.
- Work in small sections, so stripped areas don’t dry out before being rinsed.
- Rinse scraper tools periodically to avoid transferring paint scrapings from one area to another.
- Take care not to gouge or scrape too aggressively to avoid damaging the brick underneath.
Slow, gentle scraping is key. Let the chemicals do most of the work softening paint layers. Avoid being too aggressive with scraping tools.
Use Pressure Washer
Once scraping up the bulk of the loosened paint, follow up with a pressure washer:
- Test pressure washer nozzle on inconspicuous spot first. Start at low pressure and adjust as needed.
- Hold nozzle 6-12 inches away from surface at 45° angle when spraying off paint.
- Systematically work in manageable sections for most effective paint removal.
- Increase pressure slowly only if needed while checking surface after each round.
- Take extra caution pressure washing delicate, aged or deteriorated brick.
The pressure washer helps remove paint stuck in pores and divots while leaving the surface intact when used properly. Don’t try to rush through this step.
Remove Remaining Residue
After pressure washing, there will likely still be some leftover paint stripper residue or stain from the original paint:
- Apply paint thinner, mineral spirits or a stripping pad to remaining residue. Test on small area first.
- Let it soak briefly, then scrub with a non-metal brush to lift residue. Avoid abrasive scrubbing.
- Rinse and repeat process until all residues are removed from the brick surface.
- Thoroughly rinse cleaned areas with fresh water to remove all chemicals when finished stripping.
Paint thinner or mineral spirits help remove the last stubborn residues without damaging brick. Avoid leaving any chemicals behind before moving to the next step.
Let Brick Dry then Check for Remaining Paint
Before priming or sealing stripped brick, let it dry fully over 1-2 days:
- Check for any remaining paint in crevices after full drying time. Use needlenose pliers to scrape paint out of tight spots if needed.
- Look over the entire surface and touch up any last bits of paint with stripper, thinner or light sanding.
- Ensure stripped surface is neutralized and free of all residue before applying any new finish.
Thoroughly inspecting and making sure all old paint is removed ensures proper adhesion for new primer and paint. Don’t seal in leftover paint by applying new finishes too soon.
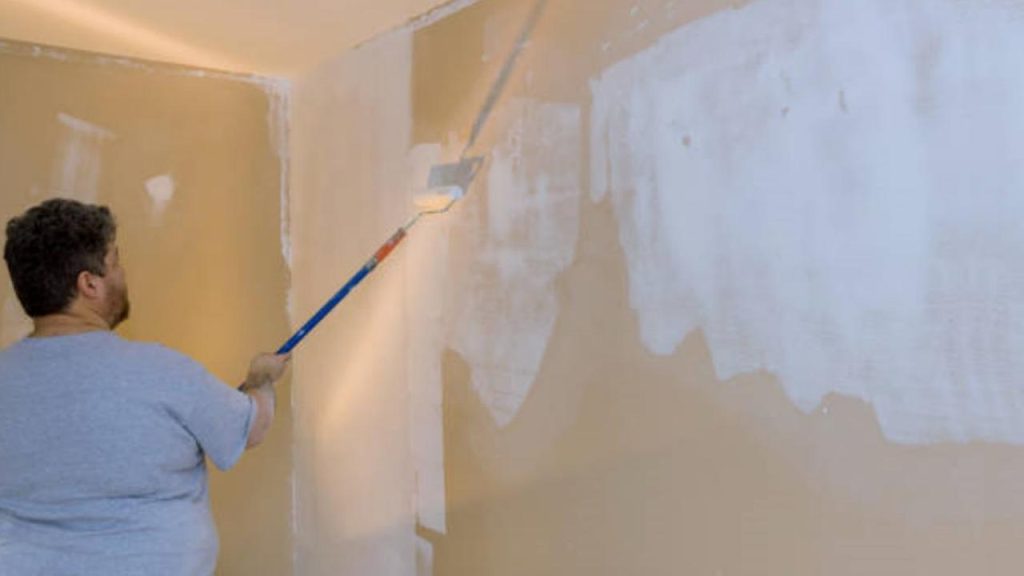
Apply Primer and Fresh Paint
If wanting to refresh the brick color, apply new masonry-specific primer and paint:
- Only prime and paint fully dry, stripped brickwork to allow proper adhesion.
- Select an exterior masonry primer specifically made for brick. This provides a base layer for paint.
- Ensure primer coat is dry before applying two finish coats of quality exterior brick paint.
- Use a brush, roller or paint sprayer for even coverage based on the brick texture and your DIY skill level.
Take your time applying new finishes. Rushing through priming or painting can lead to chipping, peeling or having to re-strip if paint doesn’t adhere properly.
And there you have the complete process for successfully removing paint from brick surfaces. While undoubtedly time consuming, the beautiful results are well worth the effort. Just be patient, use proper chemicals and scraping tools, and exercise caution when working with old paint. With some perseverance and elbow grease, you can transform your outdated painted brick into a stunning natural focal point on your home’s exterior.
FAQs About Removing Paint from Brick
Many homeowners have additional questions when starting a project to strip paint from brick. Here are answers to some of the most frequently asked questions:
What is the easiest way to remove paint from brick?
Unfortunately there are no shortcuts when it comes to removing paint from brick. While labor intensive, the most thorough (and gentle) process involves using a combination of chemical strippers to soften multiple layers of paint followed by very light scraping and moderate pressure washing to remove residue. Harsh scraping or sandblasting can damage brick.
How do I know if my brick needs repainting or stripping?
If paint is intact except for a few chips or worn areas, spot repainting may suffice. But if paint is cracking, peeling, bubbling or showing signs of alligatoring, it likely needs complete removal before repainting. If paint buildup is very thick, stripping may be better than adding more layers.
Can I use the same pressure washer setting for all brick types?
No, adjust pressure based on the hardness and condition of your brick. Old, porous brick requires very low pressure around 500-1000 PSI. Harder, intact brick may allow medium pressure up to 2500 PSI. Always test pressure on small inconspicuous area first.
How long does it take to remove paint from a brick house?
For a typical two-story house, allot 2-3 full days for stripping. Multi-layered paint could take up to 5 days. Work time estimates don’t include drying time required before reapplying finishes. Be prepared for a slow, steady process.
What’s the best way to strip paint from textured or uneven brick?
For highly textured brick surfaces, opt for chemical gels that cling to uneven surfaces rather than liquid strippers that run off. Use various [wire brushes](https://www.amazon.com/s?k={keywords}) to get into grooves. Avoid pressure washing rough surfaces which can damage soft brick.
Can I use a pressure washer alone or do I need chemicals?
Attempting to only pressure wash painted brick will likely damage the brick surface. Water pressure alone won’t fully remove multiple layers of paint. Always use chemical strippers first to lift paint layers, then follow up with moderate pressure rinsing.
How do I remove leftover stripper residue from brick?
After rinsing stripped paint, apply mineral spirits with a soft brush to dissolve remaining stripper residue. Let sit briefly then scrub gently before rinsing thoroughly. Vinegar diluted with water also helps neutralize and remove lingering residue and chemicals.
What’s the main reason why paint peels from brick?
The most common cause of peeling paint on brick is moisture getting underneath the paint over time. Proper prep and using moisture-blocking primer helps new paint adhere properly to stripped brick. Controlling exterior moisture is key to preventing future peeling.
Is it better to use liquid or gel paint stripper on exterior brick walls?
Gel strippers are preferable for exterior walls as they cling to flat and textured surfaces better than runny liquid strippers. Look for gels free of harmful methylene chloride. Apply a thick coat and allow extra time for the gel to penetrate and lift multiple paint layers compared to thinner liquid removers.
Removing paint from brick takes time and elbow grease, but restoring brickwork can be incredibly gratifying. Carefully follow these steps and arm yourself with the right tools and products for the job. With some perseverance, you’ll uncover the striking natural brick underneath years of built up paint. Just take all necessary safety precautions when dealing with chemical strippers, lead paint and operating pressure washers to get the job done safely. Your restored bare brick will add classic beauty and value to your home.
Leave a Comment